In this article, I will demonstrate a few common challenges and solutions when combining stateful applications with load balancers.
WebSockets
WebSockets are persistent, duplex sockets that enable bi-directional communication between a client and server. Applications often use WebSockets to provide real-time functionality such as chat and gaming. Let's start with some sample code for a simple WebSocket server:
const WebSocket = require("ws");
const name = require("./randomName");
const server = require("http").createServer();
const express = require("express");
const app = express();
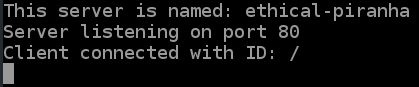
console.log(`This server is named: ${name}`);
// serve files from the public directory
server.on("request", app.use(express.static("public")));
// tell the WebSocket server to use the same HTTP server
const wss = new WebSocket.Server({
server,
});
wss.on("connection", function connection(ws, req) {
const clientId = req.url.replace("/?id=", "");
console.log(`Client connected with ID: ${clientId}`);
let n = 0;
const interval = setInterval(() => {
ws.send(`${name}: you have been connected for ${n++} seconds`);
}, 1000);
ws.on("close", () => {
clearInterval(interval);
});
});
const port = process.env.PORT || 80;
server.listen(port, () => {
console.log(`Server listening on port ${port}`);
});
We serve static files from the public directory and WebSocket connection requests on the same port. An incoming HTTP request from a browser will load public/index.html and a WebSocket connection initiated from the client will trigger the wss.on("connection", ...) code. Upon receiving a WebSocket connection, we set up a recurring callback where we tell the client how long it has been connected. Now lets take a look at the client code:
buttonConnect.onclick = async () => {
  const serverAddress = inputServerAddress.value;
  messages.innerHTML = "";
  instructions.parentElement.removeChild(instructions);

  appendMessage(`Connecting to ${serverAddress}`);

  try {
    let retries = 0;
    while (retries < 50) {
      appendMessage(`establishing connection... retry #${retries}`);
      await runSession(serverAddress);
      await sleep(1500);
      retries++;
    }

    appendMessage("Reached maximum retries, giving up.");
  } catch (e) {
    appendMessage(e.message || e);
  }
};

async function runSession(address) {
  const ws = new WebSocket(address);

  ws.addEventListener("open", () => {
    appendMessage("connected to server");
  });

  ws.addEventListener("message", ({ data }) => {
    console.log(data);
    appendMessage(data);
  });

  return new Promise((resolve) => {
    ws.addEventListener("close", () => {
      appendMessage("Connection lost with server.");
      resolve();
    });
  });
}
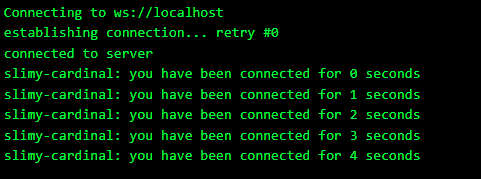
We use the WebSocket DOM API to connect to the server. Once connected, we append any received messages to console and on screen via the custom appendMessage function. If the client loses connectivity, it will try to reconnect up to 50 times. Let's run it:
Now suppose we are running a very demanding real-time application and we need to scale the server capacity beyond a single host. How would we do this? Let's create two Ubuntu 18.04 instances. Once the instances are up, SSH to each one and run the following commands:
sudo apt-get update
sudo apt-get -y install nodejs npm
git clone https://github.com/robzhu/ws-time
cd ws-time && npm install
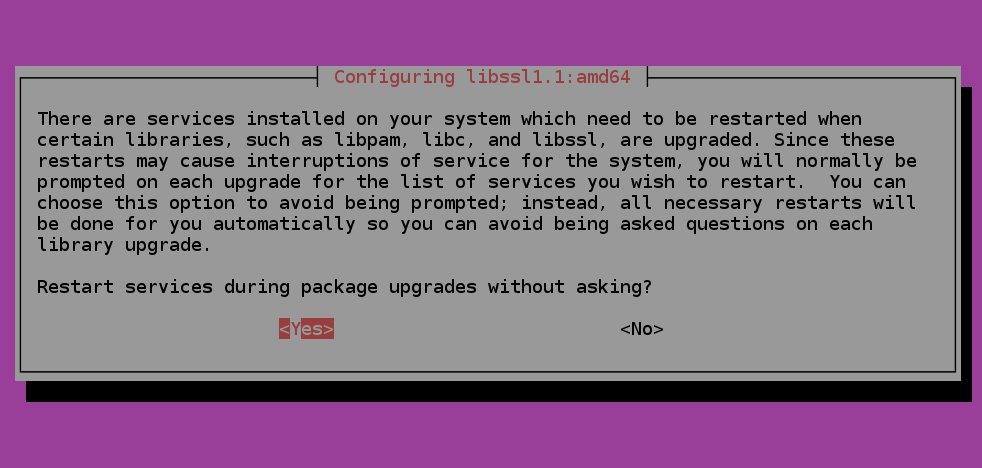
node server.jsDuring installation, select "Yes" when presented with the prompt:
Keep these SSH sessions open, we will need them shortly. Next we'll create the Load Balancer and attach the instances:
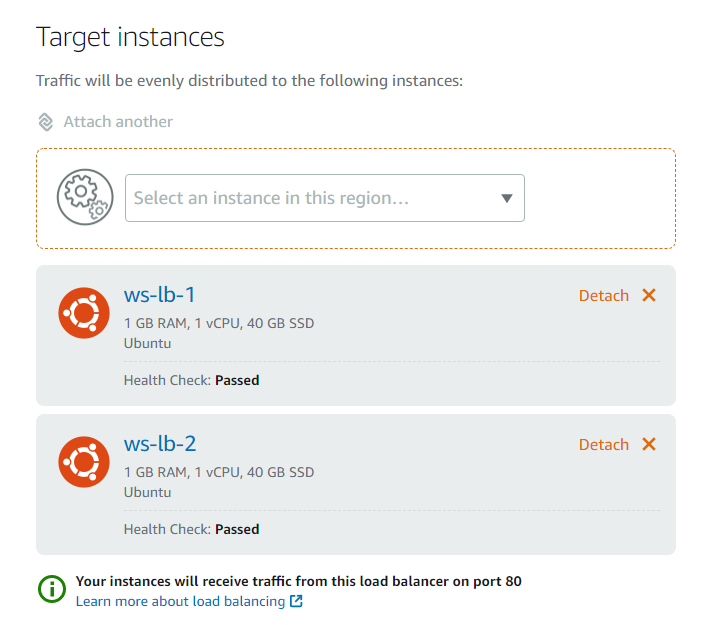
Copy the DNS name for the load balancer, open it in a new browser tab, and paste it into the WebSocket server address with the format:
ws://<DNSName>
Next, locate the SSH session that accepted the connection. It will look like this:
If we kill this process, the client will disconnect and run its retry logic, hopefully causing the load balancer to send route the client to a healthy node. Next, hit connect from the client. After a few seconds, kill the process on the server, and you should see the client reconnect to a healthy instance:
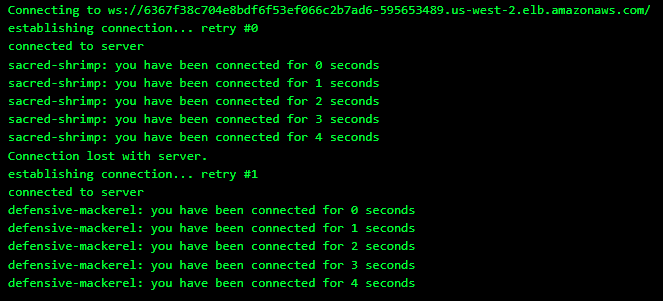
The client retry was routed to a healthy instance on the first attempt. This is due to the round-robin algorithm that the Lightsail load balancer uses. In production, we should not expect the load balancer to detect an unhealthy node immediately. If the load balancer continues to route incoming connections to an unhealthy node, the client will need more retry attempts before reconnecting. If this is a large scale system, we will want to implement an exponential backoff on the retry intervals to avoid overwhelming other nodes in the cluster (aka the thundering herd problem).
Notice that the message "you have been connected for X seconds" reset X to 0 after the client reconnected. What if we want to make the failover transparent to the user? The problem is that the connection duration (X) is stored in the NodeJS process that we killed. That state is lost if the process dies or if the host goes down. The solution is unsurprising: move the state off the WebSocket server and into a distributed cache, such as redis.
Deep Health Checks
When we attached our instances to the load balancer, our health checks passed because the Lightsail load balancer issues an HTTP request for the default path (where we serve index.html). However, if we expect most of our server load to come from I/O on the WebSocket connections, the ability to serve our index.html file is not a good health check. We might implement a better health check like so:
app.get('/healthcheck', (req, res) => {
  const serverHasCapacity = getAverageNetworkUsage() < 0.6;
  if (serverHasCapacity) res.status(200).send("ok");
  res.status(400).send("server is overloaded");
});
This will cause the load balancer to consider a node as "unhealthy" when the target node's network usage reaches a threshold value. In response, the load balancer will stop routing new incoming connections to that node. However, note that the load balancer will not terminate existing connections to an over-subscribed node.
When working with persistent connections or sticky sessions, always leave some capacity buffer. For example, do not mark the server as unhealthy only when it reaches 100% capacity. This is because existing connections or sticky clients will continue to generate traffic for that node, and some workloads may increase server usage beyond its threshold (e.g. a chat room that suddenly gets very busy).
I hope this post has given you a clear idea of how to use load balancers to improve scalability for stateful applications, and how to overcome common design challenges.